
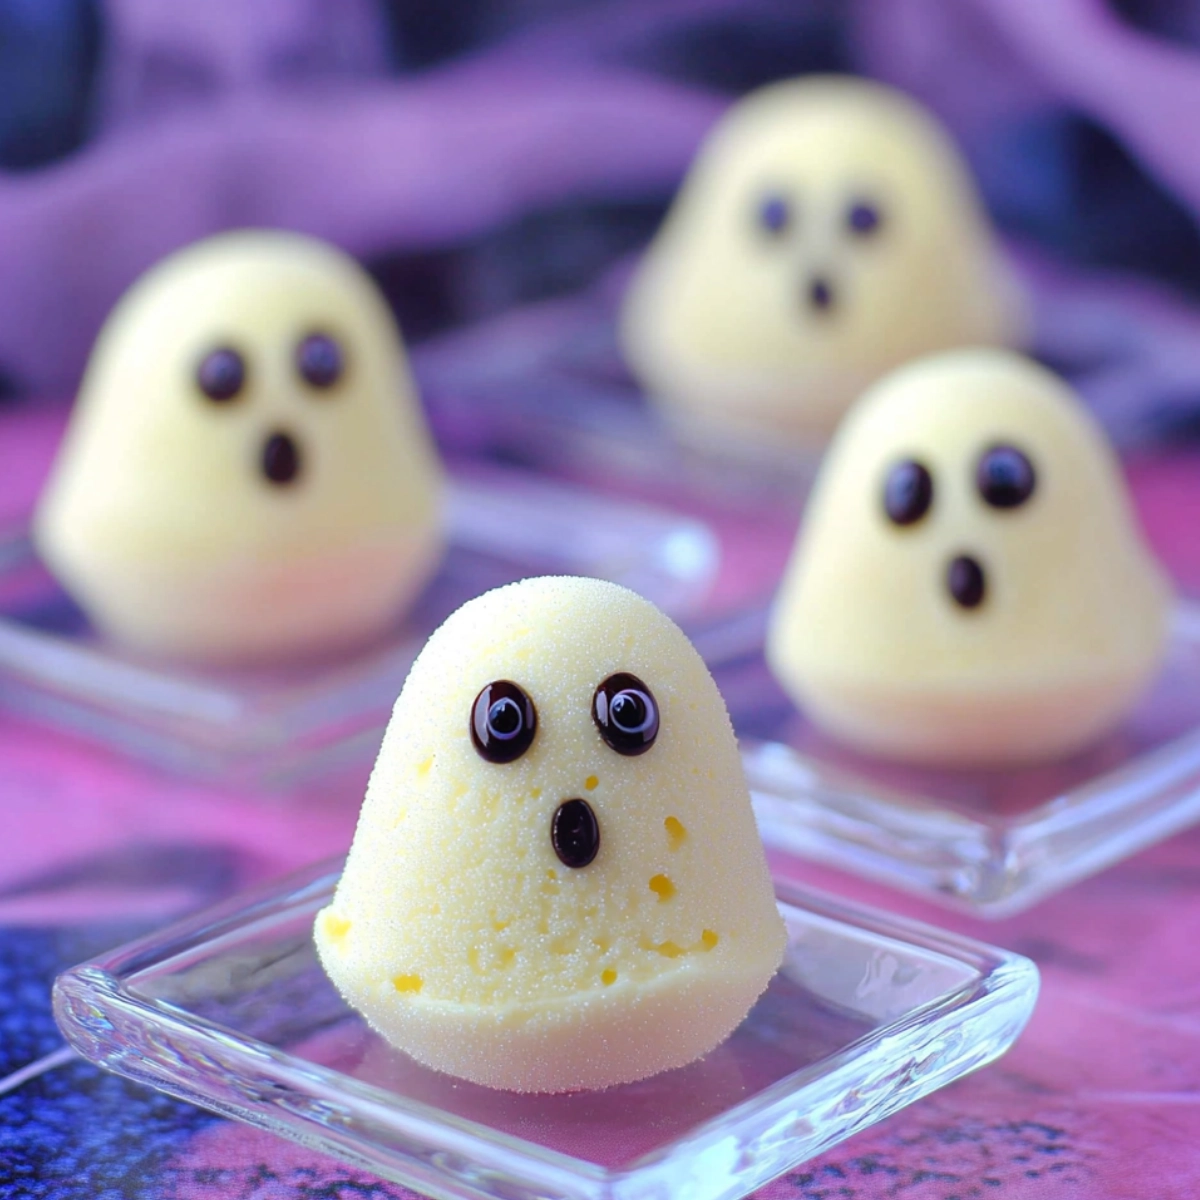
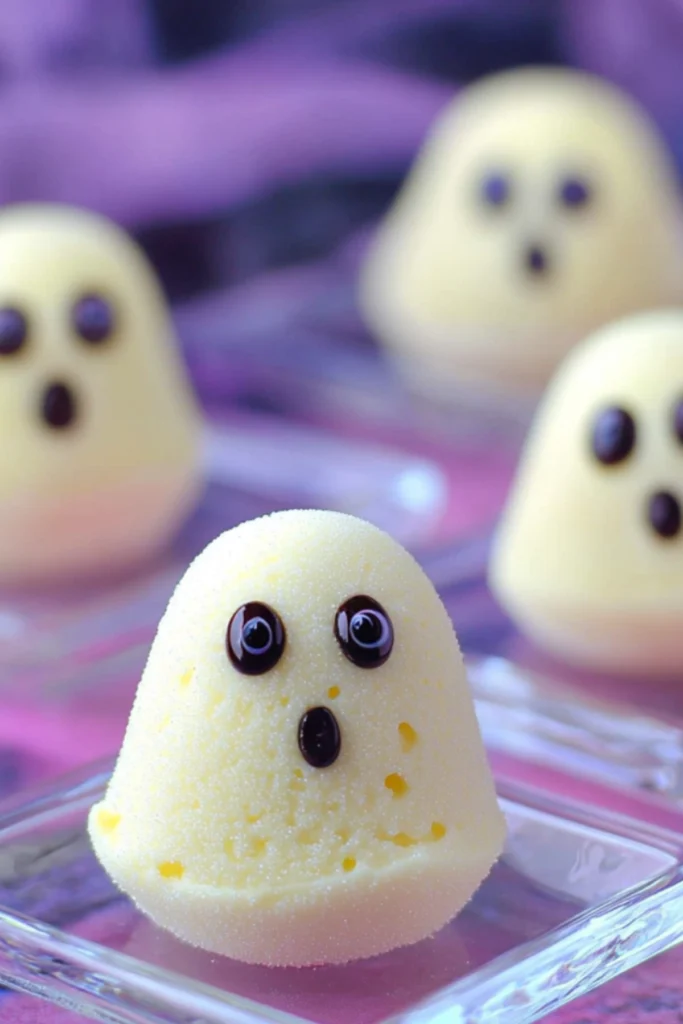
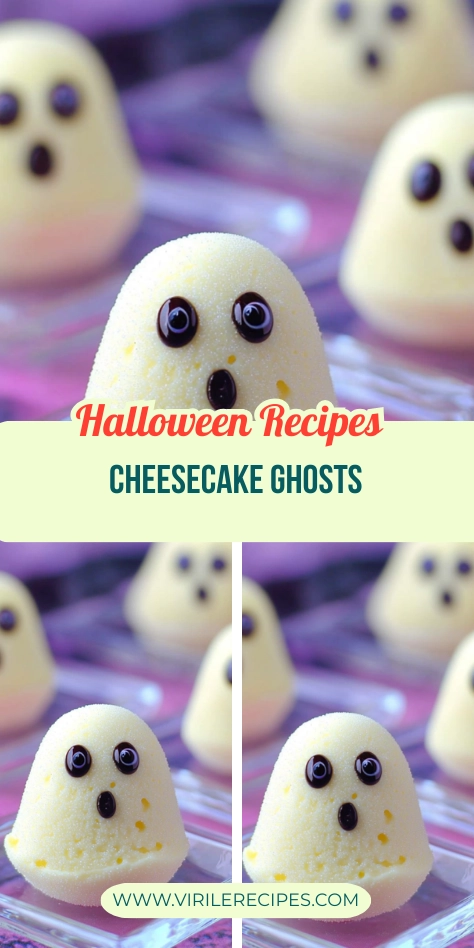
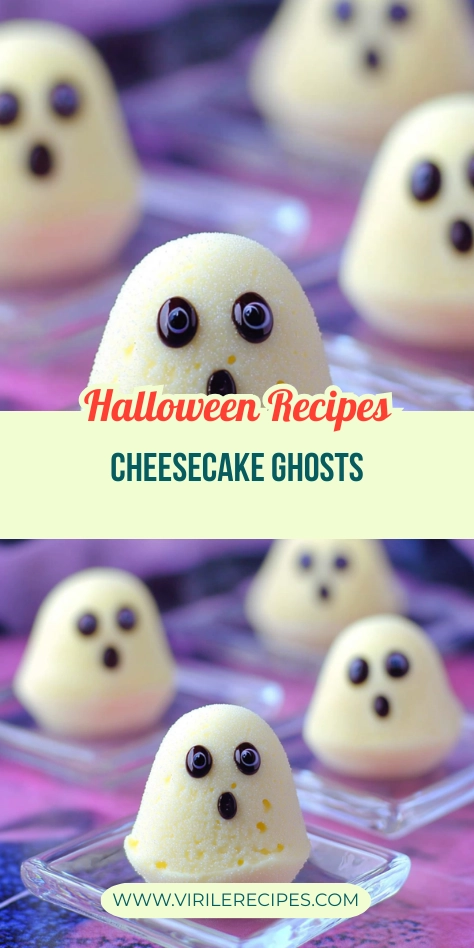
If you’re looking for a fun and easy Halloween dessert that’s adorable, spooky, and irresistibly creamy, then Cheesecake Ghosts are your new go-to treat. These mini crustless cheesecakes are shaped like little ghosts, decorated with candy eyes, and guaranteed to bring a smile to every face—no tricks here, just pure cheesecake magic.
Whether you’re planning a Halloween party, prepping lunchbox treats for the kids, or just baking for yourself (no judgment), Cheesecake Ghosts are the kind of dessert that hits the sweet spot between festive and foolproof.
This is the kind of recipe that busy parents, home cooks, and even students can whip up with zero stress and max reward. So grab your silicone ghost mold and let’s turn your kitchen into a haunted dessert lab!
Why Cheesecake Ghosts Are the Halloween Dessert You Need
The idea for Cheesecake Ghosts came from one of those “why haven’t I used this mold in years?” moments. Tucked in the back of a drawer was a silicone brownie pop mold I’d completely forgotten about. One look and I knew it was begging to become ghost-shaped food.
There’s something delightfully spooky—but still super cute—about these little guys. You don’t need any baking wizardry to make them happen either. Just a few ingredients, a little freezer time, and some edible eyes.
Plus, they’re crustless and individually portioned, making them perfect for parties, classrooms, or even Halloween night movie snacks. They also store beautifully, so you can make them ahead and impress your guests (or just yourself) without breaking a sweat.
Cheesecake Ghosts Overview
Let’s break down what makes these spooky cheesecake bites so irresistible:
| Feature | Details |
|---|---|
| Type | Mini crustless cheesecakes |
| Occasion | Halloween-themed dessert |
| Prep + Bake Time | About 45 minutes (plus freezing time) |
| Storage | Fridge (5 days) or Freezer (3 months) |
| Decorating | Add eyes & face just before serving |
| Presentation | Served on mini plates or paper liners |
| Kid-Friendly | 100% yes – ideal for Halloween parties |
| Skill Level | Super beginner-friendly |
These Cheesecake Ghosts are a real crowd-pleaser, no matter your age or baking experience. Whether you’re making them as a Halloween dessert for kids or just want something fun to share with friends, you really can’t go wrong here.
Ingredients for Cheesecake Ghosts
Here’s everything you’ll need to bring these ghostly goodies to life. You might already have most of this in your kitchen!
For the Cheesecake Filling:
- 16 oz full-fat cream cheese (softened)
- ½ cup granulated sugar
- 2 large eggs (room temperature)
- ½ cup heavy whipping cream
- 1 teaspoon vanilla extract
- Optional: white icing coloring (to enhance the ghostly whiteness)
For Decorating:
- Candy eyes
- Black confetti sprinkles or mini chocolate chips (for the mouths)
Want to keep it allergy-friendly or dairy-light? You can also try using plant-based cream cheese and a coconut-based whipping cream. Just know the texture might vary slightly.
Tools and Supplies You’ll Need
Let’s keep this simple—because nobody wants to do more dishes than necessary.
- Large mixing bowl
- Hand mixer or stand mixer
- Silicone brownie pop mold (preferably ghost-shaped)
- Rubber spatula
- Toothpick (to check doneness)
- Nonstick spray or melted butter for greasing
- Baking sheet
- Freezer-safe container
- Small serving plates or liners
Pro tip: If you don’t have a ghost-shaped mold, you can also pour the cheesecake batter into mini muffin tins. They won’t be “ghosts,” technically, but you can still decorate the tops and call them cheesecake spirits.
How to Make Cheesecake Ghosts – Step-by-Step
This Halloween cheesecake recipe couldn’t be easier. Here’s how you do it from start to spooky finish.
Step 1: Preheat and Prepare
Start by preheating your oven to 325°F. Lightly grease your silicone molds with melted butter or nonstick spray. Set them on a baking sheet for stability.
Step 2: Make the Cheesecake Filling
In a large bowl, beat the softened cream cheese and sugar until smooth and fluffy—no lumps allowed. Add the eggs one at a time, mixing well after each addition.
Next, pour in the heavy cream and vanilla extract. Beat just until combined. If you want a brighter ghost-white color, add a few drops of white icing coloring here.
Step 3: Fill the Molds
Pour the cheesecake batter into the silicone molds, filling each about ¾ of the way. Tap the tray gently on the counter to release air bubbles.
Step 4: Bake to Perfection
Place your tray in the oven and bake for 22 to 25 minutes. The tops should be just set—not browned—and they might jiggle slightly in the center.
Remove from the oven and let them cool in the mold for 1 hour.
Step 5: Freeze Until Firm
After cooling, place the molds into the freezer for at least 3 hours. Overnight is even better. This helps the Cheesecake Ghosts keep their shape and makes unmolding much easier.
Step 6: Unmold and Decorate
Carefully pop your ghost-shaped cheesecakes out of the molds. Let them sit at room temperature for 10 to 15 minutes to soften slightly.
Then, get to decorating! Add candy eyes and use either mini chocolate chips or sprinkles to make cute ghostly mouths.
Heads up: If you decorate them too early and put them back in the fridge, the candy eyes may melt or bleed. Always decorate right before serving.
Storing and Serving Cheesecake Ghosts
Here’s where Cheesecake Ghosts really shine—prep them ahead of time, store them like a pro, and serve them up without a hitch.
Storage Options:
- Fridge: Up to 5 days in an airtight container (undecorated)
- Freezer: Up to 3 months (freeze flat, undecorated for best results)
Serving Tips:
- Decorate just before serving
- Serve on small plates, mini cupcake liners, or directly on a festive dessert board
- Let them thaw for about 10–15 minutes for the best texture
These make amazing Halloween party snacks because they’re finger-friendly, look adorable on a platter, and taste even better than they look.
Fun Variations on Cheesecake Ghosts
Once you’ve mastered the classic Cheesecake Ghosts, try switching it up with some creative twists:
- No-Bake Cheesecake Ghosts: Use your favorite no-bake cheesecake base and let them set in the freezer instead of baking. Great for younger kids to help with.
- Chocolate Marble Ghosts: Swirl a little melted chocolate or cocoa into the batter before baking for a fun twist.
- Bloody Ghosts: Drizzle with raspberry or strawberry sauce for a spooky touch.
- Cookie Crust Ghosts: Add crushed Oreo or graham cracker crumbs to the bottom before pouring the batter if you’re craving that crusty base.
Check out our Mini Crème Brûlée Cheesecakes for more mini dessert inspiration, or try these gooey Churro Cheesecake Bars if you love that cinnamon-sugar vibe.
Who Will Love These Ghostly Treats?
These Cheesecake Ghosts aren’t just for kids (although kids love them too). They’re ideal for:
- Busy parents looking for an easy Halloween dessert for school events or trick-or-treat night
- Home cooks who want something seasonal but low effort
- Students working with limited time or space
- Baking enthusiasts who are always experimenting with new molds
- Working professionals hosting small gatherings or potlucks
- Travelers and newlyweds wanting something cute but not overly complicated
Basically, if you have a kitchen and a Halloween spirit, these cheesecake ghosts are for you.
More Halloween Cheesecake Recipes You’ll Love
Feeling inspired? Here are a few more Halloween-ready cheesecake treats from the VirileRecipes archives:
- Snickers Strawberry Cheesecake – Rich, chocolatey, and fruity all at once.
- Red Velvet Oreo Cheesecake – Perfect color scheme for Halloween.
- No-Bake Fireworks Oreo Cheesecake Bars – Want no oven involved? This is your go-to.
- Strawberry Cheesecake Dump Cake – Great for big family gatherings.
- Mini Coffee Cheesecakes – Because adults deserve caffeine and cheesecake.

Cheesecake Ghosts
- Total Time: 45 minutes + chilling time
- Yield: 12 mini cheesecakes 1x
Description
These adorable mini Cheesecake Ghosts are the perfect spooky-sweet Halloween dessert. Creamy, crustless, and decorated with candy eyes, they’re the easiest way to bring some fun to your Halloween spread.
Ingredients
- 16 oz full-fat cream cheese (softened)
- 1/2 cup granulated sugar
- 2 large eggs (room temperature)
- 1/2 cup heavy whipping cream
- 1 teaspoon vanilla extract
- Optional: white icing coloring
- Candy eyes
- Black confetti sprinkles or mini chocolate chips (for the mouths)
Instructions
- Preheat your oven to 325°F. Lightly grease your silicone ghost molds with melted butter or nonstick spray and place on a baking sheet.
- In a large bowl, beat cream cheese and sugar until smooth. Add eggs one at a time, mixing well after each.
- Add heavy cream and vanilla, and mix until just combined. Optional: add a few drops of white icing coloring for brighter ghosts.
- Pour the batter into molds, filling each about ¾ full. Tap tray to remove air bubbles.
- Bake for 22–25 minutes until just set. Let cool in molds for 1 hour.
- Transfer molds to freezer for at least 3 hours (or overnight) to firm.
- Unmold the cheesecakes and let sit at room temp for 10–15 minutes.
- Decorate with candy eyes and sprinkles or mini chocolate chips for mouths. Serve immediately.
Notes
Store undecorated ghosts in the fridge for up to 5 days or freeze for up to 3 months. Always decorate just before serving to prevent melting or bleeding.
- Prep Time: 20 minutes
- Cook Time: 25 minutes
- Category: Dessert
- Method: Baking
- Cuisine: American
Nutrition
- Serving Size: 1 mini ghost
- Calories: 190
- Sugar: 9g
- Sodium: 95mg
- Fat: 15g
- Saturated Fat: 9g
- Unsaturated Fat: 5g
- Trans Fat: 0g
- Carbohydrates: 10g
- Fiber: 0g
- Protein: 3g
- Cholesterol: 55mg
Final Thoughts
Cheesecake Ghosts are more than just a cute dessert—they’re a way to make your Halloween season more fun, more festive, and a whole lot sweeter. With just a few ingredients and a little freezer time, you’ll have a batch of ghostly goodies that everyone will love.
Make them with your kids, surprise your coworkers, or just treat yourself after carving pumpkins. However you serve them, these ghost-shaped cheesecakes are bound to disappear fast.
Follow us for more drool-worthy comfort food on Pinterest and join the conversation on Facebook.