
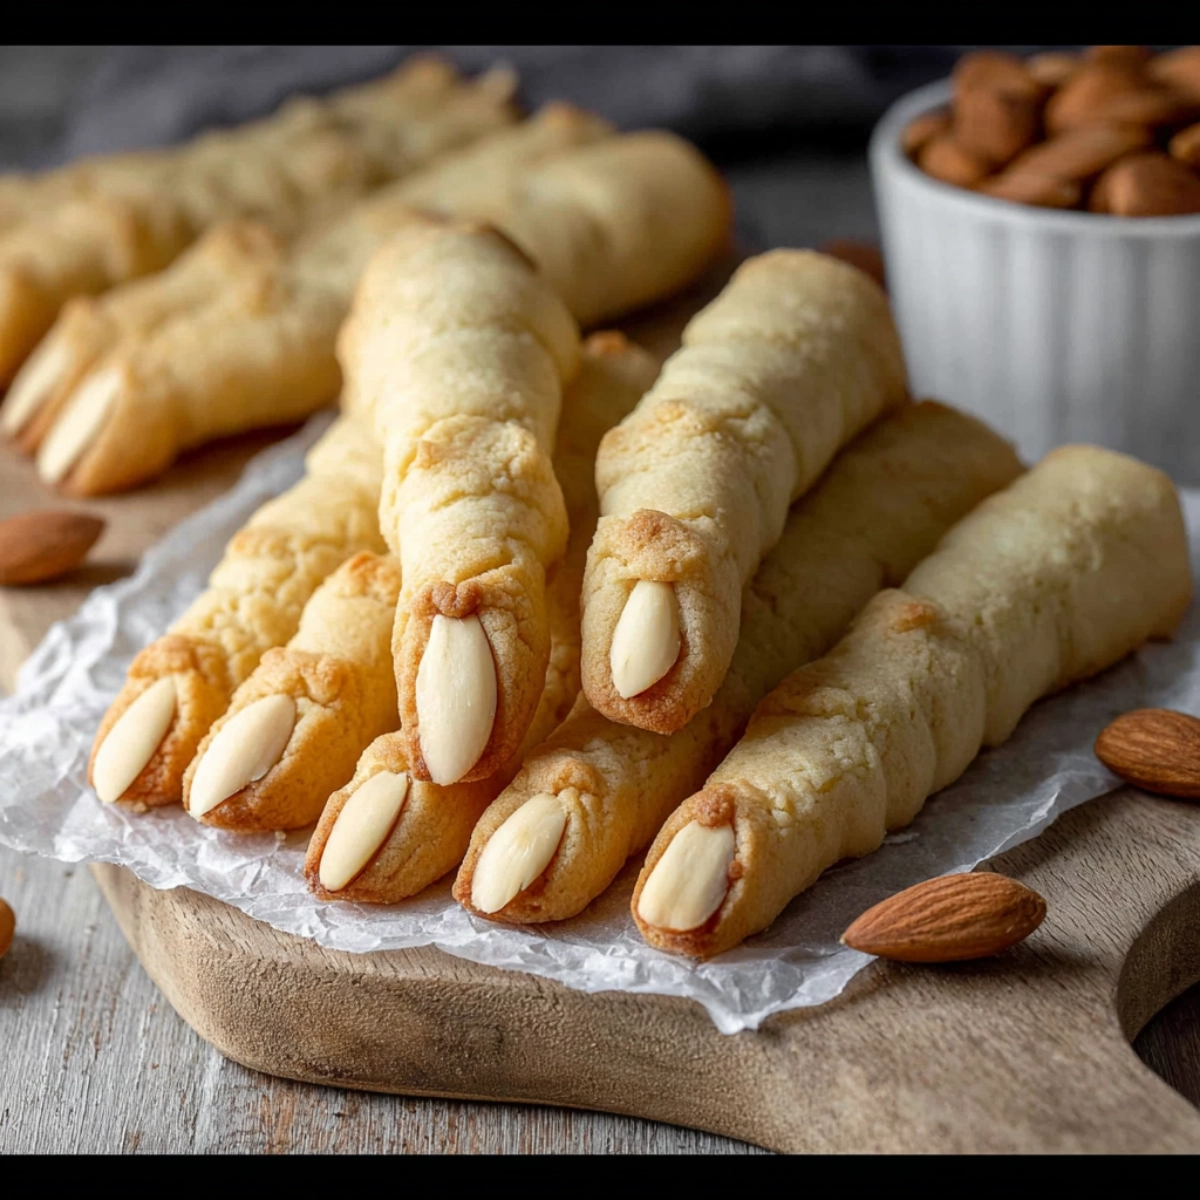
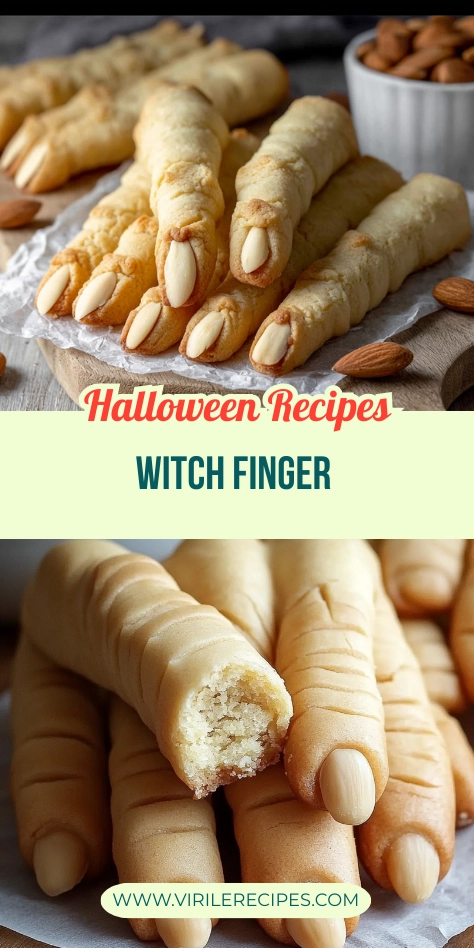
Let’s get real—Halloween is all about the snacks. And what could be creepier (or tastier) than serving up a tray of Witch Finger cookies that look so real, your guests might do a double-take?
These Witch Finger cookies are buttery, spooky, and ridiculously fun to make. Perfect for school parties, haunted house movie nights, or just scaring your kids in the most delicious way possible. You only need a handful of ingredients, a pinch of imagination, and maybe a little red jam for the gore factor.
Trust me, this is one of those Halloween cookie recipes that becomes a tradition year after year. Let’s get spooky!
Jump to
- Why You’ll Love This Witch Finger Cookie Recipe
- Ingredients You’ll Need
- How to Blanch Almonds for Witch Finger Cookies
- How to Make Witch Finger Cookies Step-by-Step
- Substitutions You Can Try
- Spooky Variations to Get Creative
- How to Store Witch Finger Cookies
- Top Tips for Perfect Witch Fingers
- FAQs
- How to Serve Witch Finger Cookies
- Final thoughts
Why You’ll Love This Witch Finger Cookie Recipe
If you’re the type who wants maximum Halloween effect with minimum kitchen chaos, this is the recipe for you. Here’s why these Witch Finger cookies totally deliver:
- Beginner-friendly: Even if you’ve never baked from scratch before, you won’t mess this up.
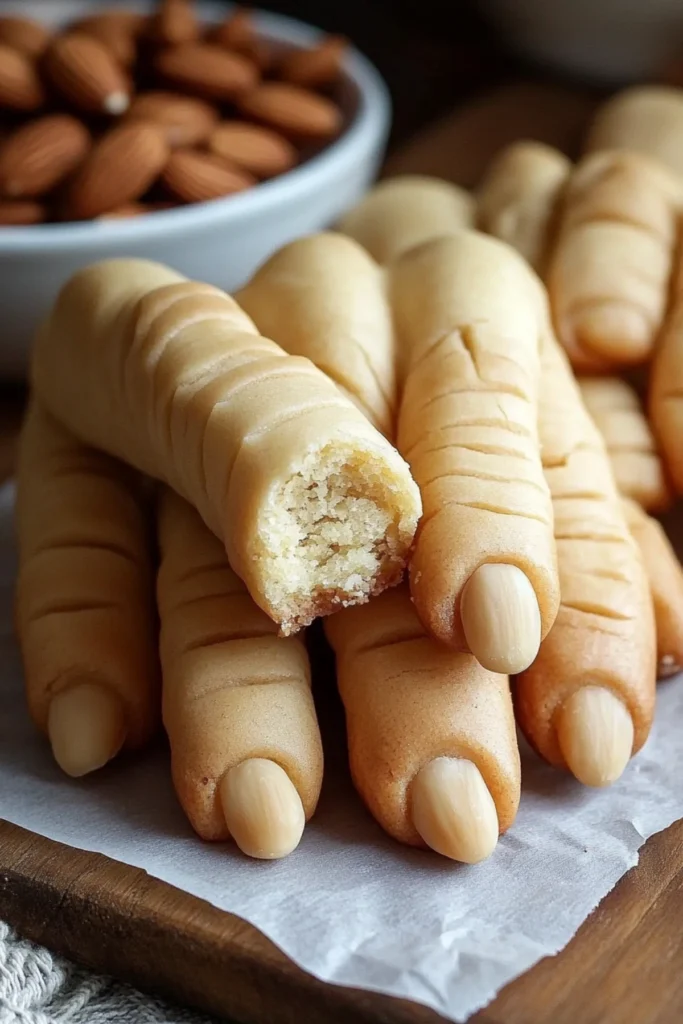
- Super realistic look: The creepy almond fingernail, the wrinkled knuckles… it’s all in the details.
- Kid-approved: This is one of those rare baking projects that’s equal parts fun and edible.
- Customizable: Want green dough? Red jam? Chocolate fingers? You do you, boo.
We’re not just making cookies—we’re creating edible spooky treats that steal the show.
Ingredients You’ll Need
The ingredient list for these Witch Finger cookies is shockingly short, but don’t let that fool you. These Halloween cookies come out flavorful and crumbly, just like a perfect shortbread.
Here’s what you’ll need:
- 2 1/2 cups (310g) all-purpose flour
- 1 cup (225g) unsalted butter, softened
- 3/4 cup (90g) powdered sugar
- 1/4 teaspoon salt (skip if using salted butter)
- Blanched almonds (for fingernails)
- Optional:
- Green food coloring (for extra witchy vibes)
- Red gel or raspberry jam (for blood effects)
- 1 tsp vanilla or almond extract
That’s it. No eggs, no fuss. Just buttery dough ready to be transformed into finger-shaped cookies.
How to Blanch Almonds for Witch Finger Cookies
You can buy pre-blanched almonds, but if you only have raw almonds on hand, don’t worry. Blanching them is easy:
Option 1: Quick Boil Method
- Boil water in a small saucepan.
- Add raw almonds and boil for 60 seconds.
- Drain and rinse under cold water.
- Squeeze the almonds—skins should slide right off.
Option 2: Hot Soak Method
- Soak almonds in very hot water for 10 minutes.
- Drain and peel skins.
Set aside your creepy little almond fingernails for later. You’ll need them when we build the fingers.
How to Make Witch Finger Cookies Step-by-Step
These witch finger cookies come together in a few easy steps. Here’s how to create them from scratch:
1. Make the Dough
In a mixing bowl or food processor, combine softened butter and powdered sugar until creamy. Add salt and optional vanilla or almond extract. Slowly add flour and mix until a soft dough forms.
If you’re going spooky, add green food coloring now.
2. Chill the Dough
Wrap the dough in plastic wrap and refrigerate for 30–60 minutes. Chilling helps the dough firm up, so the fingers won’t spread too much while baking.
3. Shape the Fingers
Take about a tablespoon of dough and roll it into a log, about 3–4 inches long—roughly the length and thickness of a real finger.
Pro tip: Use your own fingers as a guide. Seriously. Just look down and roll!
4. Add the Details
- Press a blanched almond into one end for the fingernail.
- Use a paring knife to make small slits where the knuckles should be.
- You can pinch the dough slightly between knuckles to add “joints.”
Want them super creepy? Bend the fingers a little.
5. Bake
Preheat oven to 320°F (160°C). Line a baking sheet with parchment paper.
Bake cookies for 12–15 minutes until they’re just starting to turn golden at the bottom. Do not overbake—you want these pale and lifelike!
Let cool on the pan for 5 minutes, then transfer to a wire rack.
6. Add the Gore (Optional)
After baking, lift the almond nail, add a dab of red gel or jam, then press the almond back on. The “blood” will ooze out around it.
Gross. Delicious. Perfect.
Substitutions You Can Try
No unsalted butter? Go ahead and use salted—just skip the added salt.
Need a nut-free version? Try M&Ms, chocolate chips, or even little candy eyes as creepy fingernails.
Want gluten-free Witch Finger cookies? Use a 1:1 gluten-free flour blend. The texture will change a bit, but still spooky and tasty.
Spooky Variations to Get Creative
You don’t have to stick to the classic shortbread look. These Halloween finger cookies are super adaptable.
- Color It Green: Add a few drops of green food coloring to your dough for Frankenstein-style fingers.
- Flavor Twist: Swap in almond extract, orange zest, or even cinnamon for fall vibes.
- Blood Everywhere: Use raspberry or strawberry jam to drizzle around the nail and at the knuckle creases.
- Burned Witch Fingers: Brush baked fingers with cocoa powder for a dusty, charred look.
If you’re going all in on the Halloween theme, consider pairing them with our Bloody-Themed Cupcakes for Halloween or serve alongside Gory Red-Filled Cookies for extra impact.
How to Store Witch Finger Cookies
These Witch Finger cookies store beautifully, making them perfect for prepping ahead of your Halloween bash.
- Room temp: Store in an airtight container for 5–7 days.
- Fridge: Store longer if you’ve used jam or gel.
- Freezer: Freeze raw dough logs or shaped fingers for up to 2 months. Bake directly from frozen—just add a couple of minutes to the bake time.
Top Tips for Perfect Witch Fingers
- Use softened butter: Cold butter won’t cream well. Melted butter makes them spread.
- Chill the dough: You really don’t want blobs instead of fingers.
- Don’t skip the knuckles: Those slits bring the spook factor.
- Let them cool before adding jam or gel: Otherwise, it’ll melt and slide off.
Bonus tip: Bake a few with broken or missing nails for that extra gross-out factor.
FAQs
Yes, you can—but the homemade shortbread dough gives a better texture and flavor.
Absolutely. Make the dough 2–3 days ahead or freeze shaped cookies before baking.
Yes. You can use candies or carve a nail shape directly into the dough.
Totally. It’s a classic shortbread base. Check out our Soft Shortbread-Inspired Cookies for more ideas.
Color the dough, add red jam, distort the shape, or dust with cocoa powder. The creepier the better!
How to Serve Witch Finger Cookies
These aren’t your everyday tea party snacks. Go big with presentation:
- Arrange in a witch’s cauldron or on a silver platter with fake cobwebs
- Surround with candy eyeballs or gummy worms
- Serve with blood-red punch or thick chocolate pudding for “mud”
- Use as creepy place settings for a Halloween dinner
Looking for more Halloween dessert ideas? We’ve got some wild ones right here: Halloween Dessert Ideas
Witch Fin
Print
Witch Finger Cookies
- Total Time: 35 minutes
- Yield: 24 cookies 1x
- Diet: Vegetarian
Description
Buttery, spooky, and irresistibly creepy, these Witch Finger Cookies are a Halloween showstopper. Whether you’re throwing a haunted bash or just want to serve a spooky snack, these are sure to impress—and maybe even scare!
Ingredients
- 2 1/2 cups (310g) all-purpose flour
- 1 cup (225g) unsalted butter, softened
- 3/4 cup (90g) powdered sugar
- 1/4 teaspoon salt (skip if using salted butter)
- Blanched almonds (for fingernails)
- Optional: Green food coloring
- Optional: Red gel or raspberry jam
- Optional: 1 tsp vanilla or almond extract
Instructions
- In a mixing bowl, cream together softened butter and powdered sugar until smooth. Add salt and optional vanilla or almond extract.
- Gradually add flour and mix until a soft dough forms. If desired, add green food coloring now.
- Wrap the dough in plastic wrap and refrigerate for 30–60 minutes.
- Preheat oven to 320°F (160°C) and line a baking sheet with parchment paper.
- Take about a tablespoon of dough, roll into a 3–4 inch log, and shape like a finger. Press a blanched almond into one end as a nail.
- Use a knife to score lines for knuckles and pinch for joint shapes. Slightly bend for a spooky look.
- Place shaped cookies on the baking sheet and bake for 12–15 minutes until lightly golden underneath.
- Cool for 5 minutes on the tray, then transfer to a wire rack.
- For a gory effect, lift almond, add red jam or gel underneath, and press it back to ooze “blood”.

Notes
Store in an airtight container for 5–7 days. Dough can be frozen before baking. For nut-free options, use candy alternatives for nails.
- Prep Time: 20 minutes
- Cook Time: 15 minutes
- Category: Dessert
- Method: Baking
- Cuisine: Halloween Treats
Nutrition
- Serving Size: 1 cookie
- Calories: 89
- Sugar: 5g
- Sodium: 40mg
- Fat: 4.5g
- Saturated Fat: 2.5g
- Unsaturated Fat: 1.8g
- Trans Fat: 0g
- Carbohydrates: 11g
- Fiber: 0.3g
- Protein: 1.2g
- Cholesterol: 10mg
Final thoughts
This Witch Finger cookie recipe isn’t just another Halloween gimmick—it’s a guaranteed conversation starter and a total crowd-pleaser. Whether you’re throwing a Halloween bash or just want to freak out your kids (in the most loving way), these cookies are your ticket.
And hey, if you enjoyed this one, don’t forget to check out more chilling and thrilling recipes right here on the blog.
Follow us for more drool-worthy comfort food on Pinterest and join the conversation on Facebook.