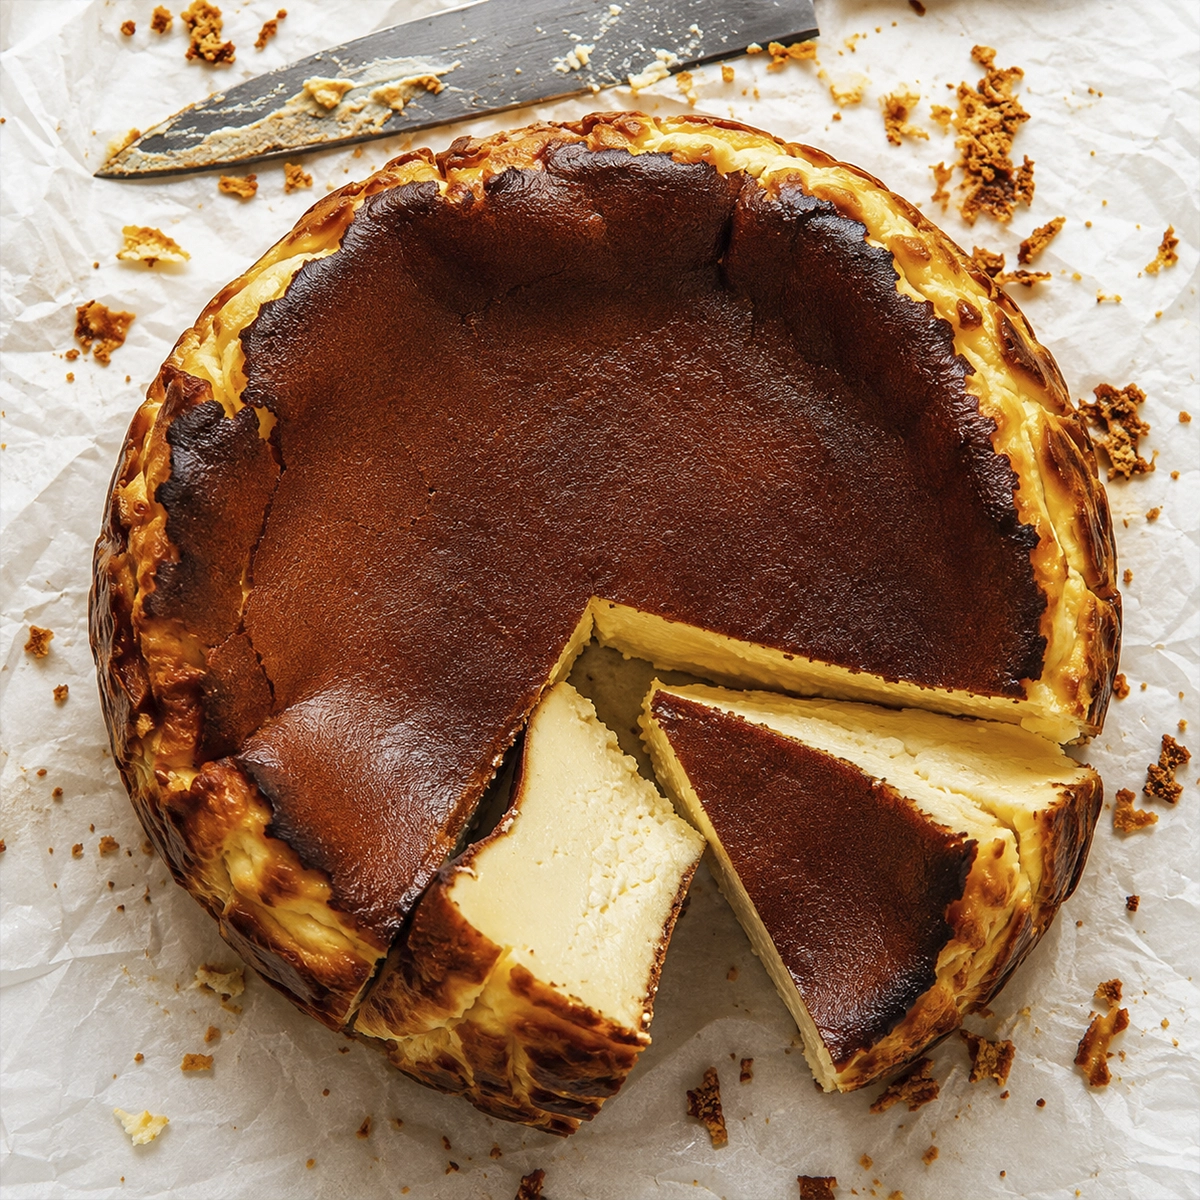
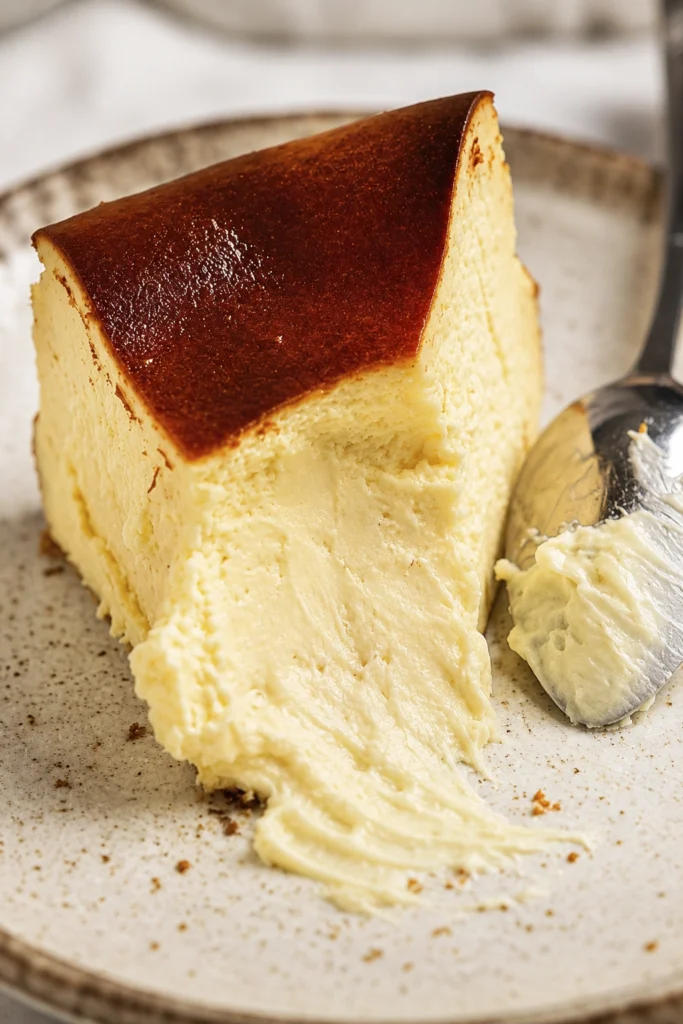
Basque burnt cheesecake is the kind of dessert that makes you question everything you thought you knew about baking cheesecake. The top is dark, the sides are wrinkled, the center sinks after baking, and somehow all of that is exactly right. Cut through the caramelized surface and you’ll find a soft, creamy vanilla center that feels almost custardy on your tongue.
Originally associated with San Sebastián in Spain’s Basque Country, this crustless cheesecake has become famous for its dramatic appearance and surprisingly simple method. Unlike a classic New York cheesecake, there’s no cookie crust to press into a pan and no water bath to wrestle into the oven. High heat creates that signature deeply browned top while the middle stays wonderfully creamy.
The trick is knowing when to stop baking. Your cheesecake should look deeply caramelized around the outside while the center still has a noticeable wobble. It may look risky the first time. Trust the process. Once chilled, that soft middle settles into the rich, silky texture that makes burnt Basque cheesecake so special.
Basque Burnt Cheesecake Ingredients and Why They Matter
Basque burnt cheesecake doesn’t hide behind a long ingredient list. You’ll need 750 grams of full fat cream cheese, 1 cup caster or superfine sugar, 1 1/4 cups heavy whipping cream, 1/4 cup all purpose flour, 1 teaspoon vanilla extract or vanilla bean paste, and about 4 to 5 large eggs. Lightly whisk the eggs and measure roughly 200 ml so the amount stays consistent.
Full fat cream cheese gives the filling its creamy body, while heavy whipping cream softens the texture. A small amount of flour adds just enough structure without turning the center dry or cakey. Vanilla rounds everything out, and the sugar does more than provide sweetness. Along with the dairy proteins, it helps create the gorgeous caramelized character on top.
Room temperature cream cheese is important because cold cream cheese tends to stay lumpy. Take the whipping cream out of the refrigerator about 15 minutes before mixing as well. We’re not trying to make anything warm. We simply want ingredients that blend together without a fight.
Basque Burnt Cheesecake Equipment and Pan Preparation
Basque burnt cheesecake works beautifully in an 8 inch or 20 cm springform pan with reasonably tall sides. You’ll also need parchment paper, mixing bowls, a whisk, an electric hand mixer or stand mixer, and a spatula. A kitchen scale is handy because accurate dairy and egg measurements make the recipe easier to repeat.
Now comes the fun part. Take two large sheets of parchment paper and crumple them in your hands. Open them again and press them into the pan, overlapping the sheets so the bottom and sides are covered. Leave plenty of paper sticking above the rim because the cheesecake rises dramatically during baking.
Don’t try to smooth every wrinkle. Those crinkled edges create the classic rustic appearance of a San Sebastian cheesecake. The parchment also makes removal easier after chilling. If it looks slightly messy before the batter goes in, you’re doing just fine.
Basque Burnt Cheesecake Batter for a Creamy Center
Basque burnt cheesecake gets its best texture when the batter is mixed carefully rather than aggressively beaten from beginning to end. Start by beating the room temperature cream cheese on medium speed for about 2 minutes. Scrape the bowl when necessary and continue until it looks smooth and free from obvious lumps.
Add the sugar and mix briefly on low. In a separate bowl, whisk the flour with about one quarter of the heavy cream until smooth. It may resemble a thick paste at first. Gradually add the remaining cream while whisking, then stir in the vanilla. Starting with a small amount of cream makes the flour much easier to mix without stubborn little lumps.
Slowly pour the cream mixture into the cream cheese while mixing on low. Next, gradually add the lightly whisked eggs. Stop the mixer as soon as everything comes together. Too much mixing at this stage can introduce unnecessary air bubbles. We’re making creamy cheesecake, not trying to inflate a balloon.
Basque Burnt Cheesecake Baking Temperature and Timing
Basque burnt cheesecake needs a hot oven. Preheat it to 425°F or 220°C, using about 400°F or 200°C for a fan assisted oven. This high temperature separates the recipe from many traditional baked cheesecakes, which are usually cooked more gently to keep their tops pale.
Pour the silky batter into your prepared pan and tap the pan against the counter a few times. This encourages trapped air bubbles to rise. Pop obvious bubbles with the tip of a small sharp knife, then place the cheesecake on the middle oven rack. Start checking around 45 minutes, but don’t become obsessed with the timer.
Different ovens brown at different speeds, so your cheesecake may need closer to 55 or even 65 minutes. Color and movement are much better clues. The top should become deeply golden brown with darker patches, while the center should still wobble when you gently move the pan.
Basque Burnt Cheesecake Doneness and the Famous Burnt Top
Basque burnt cheesecake gets its name from its striking dark surface, but the goal isn’t to turn your dessert into charcoal. You want deep browning that creates toasted, caramel like flavors. A little bitterness against the sweet, tangy cream cheese filling is part of what makes each bite so interesting.
The middle tells you just as much as the top. When the cheesecake comes out of the oven, its center should jiggle like soft custard. Don’t wait until the entire cake becomes firm. A solid center while the cheesecake is still blazing hot can mean you’ve baked away some of the creamy texture you’re trying to create.
This is also why the usual toothpick test isn’t particularly helpful here. You’re not baking a sponge cake. Judge your burnt Basque cheesecake by its deeply browned surface, set outer portion, and noticeably wobbly center.
Basque Burnt Cheesecake Cooling and Overnight Chilling
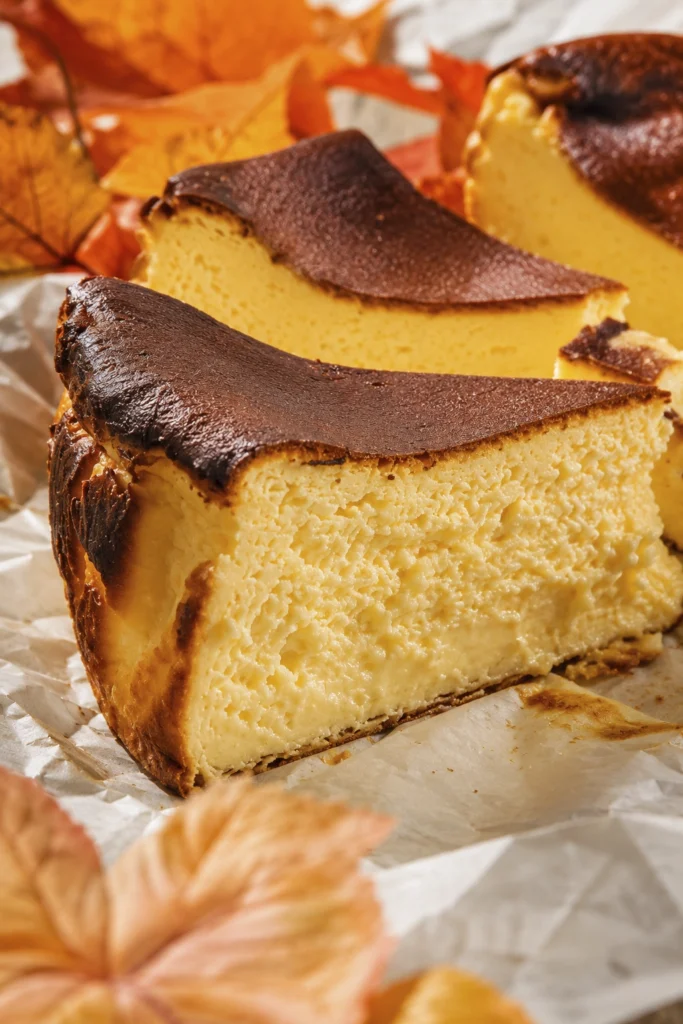
Basque burnt cheesecake will probably look huge when it first comes out of the oven. Then, while you’re admiring your work, it will start sinking. Don’t panic. The dramatic rise and fall are normal characteristics of this style of cheesecake.
Leave the cake in its pan and let it cool at room temperature for about 2 hours. After that, place it in the refrigerator for at least 8 hours. Overnight is even better. That waiting period gives the center enough time to set while keeping the creamy, delicate consistency you’re after.
Chilling it uncovered at first can also help prevent residual warmth from creating condensation over the beautifully browned surface. Once fully cold, you can cover it for storage. Yes, waiting until tomorrow feels slightly unfair after your kitchen has smelled like vanilla cheesecake for hours. Tomorrow’s first bite makes up for it.
Basque Burnt Cheesecake Texture and Flavor
Basque burnt cheesecake sits in its own little cheesecake category. A classic New York cheesecake tends to be dense, firm, rich, and frequently served over a cookie crust. A Spanish Basque cheesecake is crustless and softer, with a much more rustic personality.
The middle should taste creamy and lightly tangy with plenty of vanilla, while the browned surface brings toasted sugar and caramel notes. Together, those two layers can remind you of the contrast found in crème brûlée, where creamy custard meets caramelized sugar.
If creamy cheesecake desserts are your weakness, you can also try these No Bake Margarita Cheesecake Bites. They’re a useful contrast to this baked recipe because they offer bright citrus flavor in a small no bake dessert.
Basque Burnt Cheesecake Mistakes to Avoid
Basque burnt cheesecake is forgiving, but a few small mistakes can change its texture. One of the biggest is using cold cream cheese. If your cream cheese is still firm from the refrigerator, getting a truly smooth batter becomes difficult. Give it enough time at room temperature before you begin.
Another common mistake is overmixing after adding the eggs. Keep the mixer on low and stop once the batter is smooth. Also, don’t pull the cake from the oven just because its surface looks darker than a normal cheesecake. Deep caramelization is exactly what we’re chasing.
On the other hand, don’t wait for a completely firm center. A soft jiggle is your friend. The cheesecake continues setting while cooling and becomes much easier to slice after its long refrigerator rest.
Basque Burnt Cheesecake Serving Suggestions
Basque burnt cheesecake doesn’t need much decoration. Once completely chilled, release the springform pan and gently peel the parchment away from the sides. You can leave the cake sitting on the paper for a rustic presentation or carefully move it to a serving plate.
For neat slices, use a sharp knife and wipe the blade clean between cuts. Serve it cold if you like a firmer bite, or let individual slices sit at room temperature for about 20 to 30 minutes when you want the middle softer and creamier.
I’d taste the first slice plain before reaching for sauces or fruit. The caramelized top already provides plenty of character. If you’re building a dessert table and want something with cinnamon alongside it, this Churro Cheesecake Recipe gives you another cheesecake option with a very different flavor and texture.
Basque Burnt Cheesecake Storage and Make Ahead Tips
Basque burnt cheesecake is practically designed for making ahead because it needs several hours in the refrigerator anyway. Bake it the afternoon or evening before you plan to serve it, let it cool, and refrigerate overnight. The next day, dessert is already waiting for you.
Keep leftovers refrigerated in a covered container once the cheesecake is fully cold. For the best quality, enjoy it within several days. The flavor can become even more rounded after the first night as the vanilla, tangy cream cheese, and caramelized notes settle together.
Want cheesecake without turning on the oven next time? This Philadelphia Cheesecake No Bake is worth keeping nearby. It’s particularly handy during warmer weather when a blazing hot oven isn’t exactly welcome.
Basque Burnt Cheesecake Frequently Asked Questions
A jiggly middle immediately after baking is normal. The center continues setting as the cheesecake cools and spends several hours in the refrigerator.
The surface should be deeply browned and caramelized rather than completely charred. Those dark areas contribute toasted and slightly bitter flavors that balance the sweet, creamy center.
No cookie crust is required. The creamy batter goes directly into a parchment lined pan, creating a dessert that’s all cheesecake from the caramelized top to the soft bottom.
Yes. Making it one day ahead is actually a great idea because the cheesecake needs at least 8 hours to chill properly. Bake it the previous day and refrigerate it overnight.
Sinking is expected. The cheesecake rises significantly in the hot oven before falling as it cools. That rustic sunken center is one of the recognizable features of San Sebastian cheesecake.
No. You can bake this crustless cheesecake directly in its parchment lined pan without a water bath, which makes preparation considerably simpler than many classic baked cheesecake recipes.
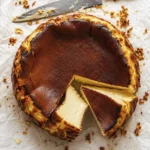
Basque Burnt Cheesecake Recipe: Creamy, Caramelized, and Easy
- Total Time: 10 hours 25 minutes
- Yield: 10 to 12 servings 1x
- Diet: Vegetarian
Description
Basque burnt cheesecake is a crustless Spanish cheesecake with a deeply caramelized top and a soft, creamy vanilla center. Baked at high heat and chilled overnight, it delivers a rich caramel flavor with a smooth, custardy texture.
Ingredients
Instructions
1. Preheat the oven to 425°F or 220°C. For a fan assisted oven, use 400°F or 200°C.
2. Crumple two large sheets of parchment paper, open them again, and press them into an 8 inch springform pan, leaving enough paper above the rim.
3. Beat the room temperature cream cheese for about 2 minutes until smooth and free from lumps.
4. Add the sugar and mix briefly on low speed until combined.
5. In a separate bowl, whisk the flour with about one quarter of the heavy whipping cream until smooth and lump free.
6. Gradually whisk in the remaining cream, then add the vanilla.
7. With the mixer on low speed, slowly pour the cream mixture into the cream cheese mixture.
8. Gradually add the lightly whisked eggs and stop mixing as soon as the batter is smooth and evenly combined.
9. Pour the batter into the prepared pan. Tap the pan against the counter several times and pop any visible surface bubbles with the tip of a small knife.
10. Bake for about 45 minutes, then check the cheesecake. Continue baking as needed until the top is deeply golden brown and caramelized while the center remains noticeably jiggly. Depending on the oven, total baking time may reach 60 to 65 minutes.
11. Remove the cheesecake from the oven and cool it in the pan at room temperature for about 2 hours.
12. Refrigerate for at least 8 hours, preferably overnight.
13. Once fully chilled, remove the cheesecake from the pan, peel back the parchment paper, slice with a clean sharp knife, and serve.
Notes
Use full fat cream cheese for the best creamy texture and proper setting.
Bring the cream cheese to room temperature before mixing to prevent lumps.
Do not overmix after adding the eggs because excess air can create bubbles on the surface.
The cheesecake should still jiggle in the center when it comes out of the oven.
A deeply browned top is intentional and creates the signature caramelized flavor.
The cheesecake will rise during baking and sink as it cools. This is completely normal for Basque cheesecake.
Chill for at least 8 hours before slicing for the best texture.
Serve chilled or let individual slices sit at room temperature for 20 to 30 minutes for a softer center.
Store leftovers covered in the refrigerator and enjoy within 5 days.
- Prep Time: 20 minutes
- Cook Time: 45 to 65 minutes
- Category: Dessert
- Method: Baking
- Cuisine: Basque, Spanish
Nutrition
- Serving Size: 1 slice
- Calories: 398
- Sugar: 20 g
- Sodium: 224 mg
- Fat: 32 g
- Saturated Fat: 19 g
- Unsaturated Fat: 10 g
- Trans Fat: 0.01 g
- Carbohydrates: 23 g
- Fiber: 0.1 g
- Protein: 7 g
- Cholesterol: 146 mg
Basque Burnt Cheesecake Final Tips for Perfect Results
Basque burnt cheesecake becomes much easier once you stop judging it by ordinary cheesecake rules. The parchment can be wrinkled. The surface should become dark. The cake will rise and collapse. Most importantly, the center should still move when it leaves the oven.
Focus on full fat ingredients, room temperature cream cheese, gentle mixing, high heat, deep browning, and a long refrigerator rest. Those simple details are what create the contrast between the caramelized exterior and silky middle.
And when you finally cut into your homemade basque burnt cheesecake, don’t rush to cover it with toppings. Take that first forkful plain. You’ll get tangy cream cheese, soft vanilla filling, toasted caramel flavor, and that wonderful creamy texture all at once. For a cake that looks wonderfully rebellious coming out of the oven, it cleans up pretty nicely on the plate.
For more delicious recipe ideas, check out our Pinterest page at virlerecipes. Happy cooking!