
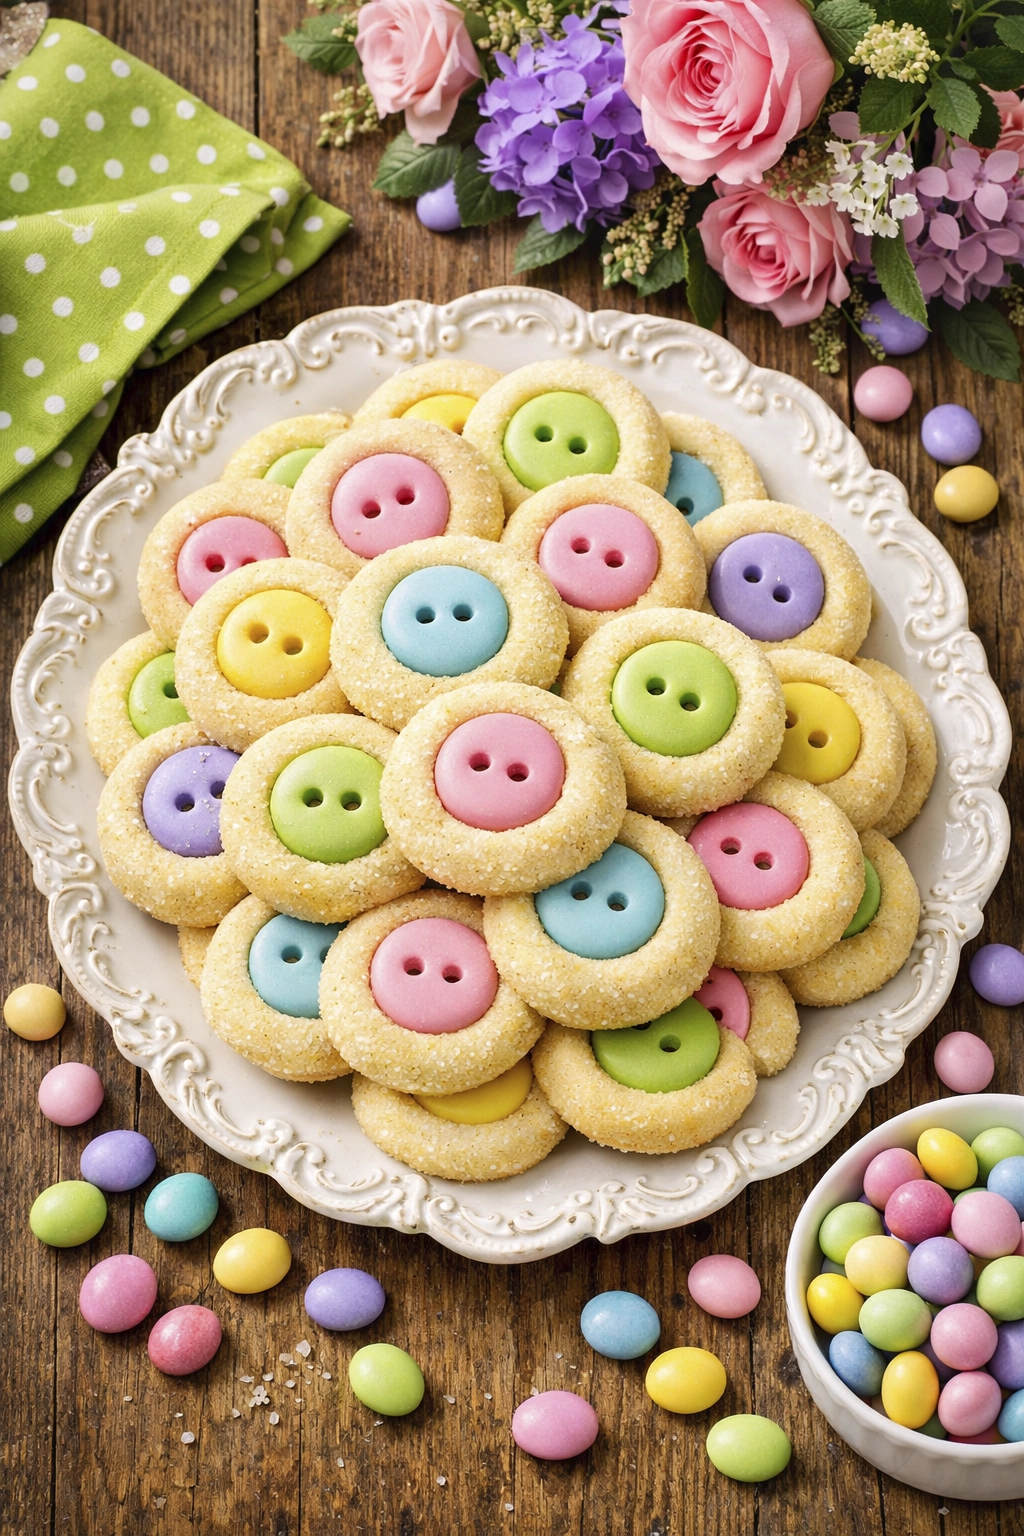
Spring baking brings a cheerful feeling into the kitchen. The sunlight is brighter, pastel decorations appear everywhere, and suddenly everyone starts craving colorful desserts again. One of the most charming treats you can bake during this season is Easter Bunny Button Cookies. These small buttery cookies are rolled in sparkling sugar and topped with bright candy centers that look like playful bunny buttons.
The beauty of Easter Bunny Button Cookies is that they combine simplicity with festive charm. They look adorable on dessert tables, taste rich and buttery, and take very little time to prepare. Families love making them during Easter because they are easy enough for beginners while still looking impressive enough for special gatherings.
These cookies are also perfect for sharing. A single batch can produce around forty eight cookies, making them ideal for parties, classroom treats, and homemade gifts. Their tiny size makes them irresistible, and guests often grab more than one without even thinking about it.
The colorful candy center gives each cookie its signature look. Pastel candy coated chocolates create a playful spring theme that fits perfectly with Easter celebrations. Meanwhile, the sanding sugar coating adds a delicate crunch and a beautiful sparkle that makes the cookies stand out.
Whether you are preparing an Easter brunch dessert table or simply want a fun weekend baking project, Easter Bunny Button Cookies are a wonderful choice.

Easter Bunny Button Cookies Recipe Overview
When it comes to holiday baking, simplicity is often the key to success. The Easter Bunny Button Cookies recipe follows a classic butter cookie method that most bakers already know. The dough comes together quickly using pantry ingredients and requires only a short baking time.
These cookies are known for their bite size shape. Each dough portion is rolled into a small ball, coated in sugar, and pressed with a candy center before baking. The result is a tray full of colorful cookies that look festive and inviting.
Because they are so small, these cookies are excellent for dessert trays. They also pair well with other baked treats. Many people enjoy serving them alongside soft and chewy Easter sugar cookies to create a colorful spring dessert spread.
Another reason this recipe is so popular is the quick preparation time. Most bakers can mix the dough, shape the cookies, and bake them in about twenty five minutes from start to finish.
Easter Bunny Button Cookies Ingredients
One of the best parts about making Easter Bunny Button Cookies is the simple ingredient list. These cookies rely on classic baking staples that create a rich buttery flavor and tender texture.
Cookie Dough Ingredients
To prepare the cookie dough you will need:
Butter
Sugar
Egg yolks
Vanilla extract
All purpose flour
Butter gives the cookies their rich flavor while egg yolks create a soft and tender crumb. Vanilla extract adds warmth and sweetness that enhances the overall taste.
Decoration Ingredients
To create the signature look of Easter Bunny Button Cookies, two additional ingredients are used.
Sanding sugar
Candy coated chocolate candies
Sanding sugar provides a sparkling coating that stays crisp during baking. The candy coated chocolates serve as the colorful button center that gives the cookies their playful appearance.
Pastel colored candies are the traditional choice for Easter because they match the spring theme beautifully.
Easter Bunny Button Cookies Step by Step Instructions
Making Easter Bunny Button Cookies is a simple process that even beginner bakers can follow with ease. Each step is straightforward and takes only a few minutes.
Preparing the Dough
Start by preheating the oven to 350°F or 175°C. Line a baking sheet with parchment paper so the cookies bake evenly and do not stick.
In a mixing bowl, cream together softened butter and sugar until the mixture becomes light and fluffy. This step helps create a soft cookie texture.
Next add the egg yolks and vanilla extract. Mix until the ingredients are fully combined.
Gradually add the flour and mix until a smooth dough forms.
Shaping the Cookies
Once the dough is ready, scoop small portions about the size of one teaspoon. Roll each portion into a small ball using your hands.
Roll the dough balls in sanding sugar so the entire surface is coated.
Place the coated dough balls onto the prepared baking sheet, leaving a little space between each cookie.
Adding the Candy Button
Press one candy coated chocolate into the center of each dough ball. The candy should sit gently on top of the dough without flattening the cookie too much.
This candy piece becomes the signature button shape of Easter Bunny Button Cookies.
Baking the Cookies
Bake the cookies for about ten to eleven minutes. The edges should appear lightly set while the center remains soft.
Allow the cookies to rest on the baking sheet for a few minutes before transferring them to a wire rack to cool completely.
Easter Bunny Button Cookies Baking Tips
Even though this recipe is simple, a few small baking tips can make Easter Bunny Button Cookies turn out perfectly every time.
Use Softened Butter
Room temperature butter blends more smoothly with sugar, creating a light cookie texture.
Do Not Overmix the Dough
Once the flour is added, mix just until the dough forms. Overmixing can make cookies dense instead of tender.
Use Coarse Sanding Sugar
Sanding sugar creates the sparkling finish that makes these cookies special. Regular sugar melts too quickly during baking.
Space Cookies Properly
Even though the cookies are small, leaving space between them allows heat to circulate evenly.
Easter Bunny Button Cookies Variations
Once you have mastered the classic recipe, there are several fun ways to customize Easter Bunny Button Cookies.
Peanut Candy Version
Use peanut filled candy coated chocolates for a richer flavor and slightly larger center.
Chocolate Cookie Version
Add a small amount of cocoa powder to the dough for a chocolate flavored cookie base.
Sprinkle Covered Cookies
Instead of sanding sugar, roll the dough in pastel sprinkles for a colorful twist.
These variations allow you to enjoy the same adorable cookie design while experimenting with new flavors.
Easter Bunny Button Cookies Serving Ideas
Serving Easter Bunny Button Cookies can be just as fun as baking them. Their colorful appearance makes them perfect for spring dessert presentations.
A simple plate piled high with these cookies instantly brightens an Easter dessert table. They also look beautiful when served with other seasonal treats like spiced carrot cake cookies
Because the cookies are bite sized, guests can easily enjoy them without needing plates or utensils.

Easter Bunny Button Cookies Storage Tips
Proper storage helps Easter Bunny Button Cookies stay fresh and delicious.
Store baked cookies in an airtight container at room temperature for up to five days. Keep the container sealed to prevent the cookies from drying out.
If you want to prepare them ahead of time, the cookies can also be frozen. Place them in a freezer safe container and freeze for up to two months. Allow them to thaw at room temperature before serving.
Easter Bunny Button Cookies for Gifts
Homemade cookies make wonderful gifts, and Easter Bunny Button Cookies are especially perfect for spring celebrations.
Place a dozen cookies into a clear treat bag and tie it with a pastel ribbon. Add a small gift tag or bunny decoration for a charming holiday touch.
You can also include them in a dessert box with other treats such as strawberry icebox cake for a complete Easter dessert package.
PrintEaster Bunny Button Cookies
- Total Time: 27 minutes
- Yield: 48 cookies 1x
- Diet: Vegetarian
Description
Easter Bunny Button Cookies are buttery bite size spring cookies rolled in sparkling sugar and topped with pastel candy coated chocolates, creating a festive and colorful Easter treat.
Ingredients
- 1 cup unsalted butter, softened
- 3/4 cup granulated sugar
- 2 egg yolks
- 1 teaspoon vanilla extract
- 2 cups all purpose flour
- 1/4 teaspoon salt
- 1/2 cup pastel sanding sugar
- 48 pastel candy coated chocolate candies
Instructions
- Preheat oven to 350°F (175°C) and line baking sheets with parchment paper.
- In a mixing bowl cream the butter and sugar together until light and fluffy.
- Add egg yolks and vanilla extract and mix until fully combined.
- Gradually add flour and salt and mix until a soft dough forms.
- Scoop small portions of dough and roll into 1 inch balls.
- Roll each dough ball in pastel sanding sugar to coat.
- Place dough balls on the prepared baking sheet spaced slightly apart.
- Gently press one candy coated chocolate into the center of each dough ball.
- Bake for 10 to 12 minutes until the edges are lightly golden.
- Allow cookies to cool on the baking sheet for a few minutes before transferring to a cooling rack.
- Serve and enjoy your colorful Easter Bunny Button Cookies.
Notes
For best results use pastel colored candy coated chocolates for a festive Easter look. Store cookies in an airtight container at room temperature for up to 5 days.
- Prep Time: 15 minutes
- Cook Time: 12 minutes
- Category: Dessert
- Method: Baking
- Cuisine: American
Nutrition
- Serving Size: 1 cookie
- Calories: 90
- Sugar: 6g
- Sodium: 35mg
- Fat: 5g
- Saturated Fat: 3g
- Unsaturated Fat: 2g
- Trans Fat: 0g
- Carbohydrates: 10g
- Fiber: 0g
- Protein: 1g
- Cholesterol: 18mg
Easter Bunny Button Cookies Final Thoughts
Few desserts capture the joy of spring baking as beautifully as Easter Bunny Button Cookies. Their colorful candy centers, sparkling sugar coating, and buttery flavor make them a favorite during Easter celebrations.
These cookies are easy to prepare, fun to decorate, and perfect for sharing with friends and family. Whether you bake them for a holiday gathering, a school event, or a homemade gift, they always bring smiles to the table.
With their charming appearance and simple preparation, Easter Bunny Button Cookies are the kind of recipe that quickly becomes a yearly Easter tradition.
For more delicious recipe ideas, check out our Pinterest page at virlerecipes. Happy cooking!